Unused content in Phoenix Wright: Ace Attorney
This page aims to catalogue all the unused and cut content of the first game in the Gyakuten Saiban/Ace Attorney series — Phoenix Wright: Ace Attorney.
The majority of the findings presented here were discovered by me, the author of this article, while I was fan-translating the game. However, some content was uncovered by folks at court-records.net, tcrf.net and other contributors.
In general, most of the unused content mentioned here is present in the GBA, NDS, and 3DS versions. However, there are exceptions. For instance, the GBA version does not feature any unused English dialogue since it was only released in Japan. The 3DS port has some unique unused graphics not found in any other version. The 2019 re-release of the Trilogy contains only a small fraction of the unused content.
This article contains spoilers.
2022.04.12 update: added one new entry to the Unused Graphics (DS) section (Early Fingerprint Minigame UI).
2022.07.11 update: added one new entry to the Unused Graphics (DS) section (Unused Lunchbox).
2026.01.14 update: improved text flow and wording throughout the article, moved Early UI Design and Early Fingerprint Minigame UI entries into a new section User Interface, added one new entry (Original Japanese evidence subscreen design) to the User Interface section, updated Early UI Designs entry with two new screenshots and details, added two new entries to the Unused Animations section (Ema Sky, Mia Fey (channeled)).
Unused Dialogues
The unused dialogues were extracted from the game scripts and may contain spelling errors due to them being unused. The provided English translation was taken from the American NDS version of the game.
Unused Dialogues: Case 2, Day 1, Investigation
Dialogue #1
Location: Mia's office.
Context: The beginning of the game, when Phoenix examines Mia's body and the crime scene.
| Unused English Dialogue | Unused Japanese Dialogue |
|
Phoenix:
No way to tell how
I wonder if someone was |
Naruhodo:
いくら入っているのかは 誰か持ち出そうとしたのだろうか。 |
Commentary: Although there is no safe to be found at that location in the final game, it was originally part of the background. It was situated to the right of the broken glass stand. It is unclear what role, if any, it played in the story. This scene also has another unused image, see the "Unused Evidence — Portable Safe" and "Unused Graphics (3DS) — Portable Safe and Clock" sections for more information.
Dialogue #2
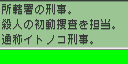
Location: Outside Mia's office, where the player meets Gumshoe for the first time.
Context: The day after Mia had been murdered.
| Unused English Dialogue | Unused Japanese Dialogue |
|
Phoenix:
The police are in there I'd better not go in. |
Naruhodo:
ドアの向こうでは、警官たちが ・・・・入らない方がいいな。 |
Commentary: It seems that, originally, the player had access to the location outside Mia's office during the day when the police investigated Fey & Co. Law Offices. This is the location that we see during the episode intro and where we meet Gumshoe for the first time. Judging from the text, Mia's office was not accessible to the player at that point — perhaps the entire conversation with Gumshoe took place outside the office.
Dialogue #3
Location: Fey & Co Law Offices.
Context: The conversation with Gumshoe, after he gives the player "Maya's Cellphone".
Commentary: When you receive "Maya's Cellphone" you can present it to Gumshoe. Doing so will trigger the following text:
| Regular Dialogue |
|
Phoenix: |
Basically, Phoenix repeats the last words he, em, "thought" after receiving the cellphone. Then, the game switches back to the four-button menu without a word from Gumshoe.
It seems the developers simply forgot to change the game logic for the next dialogue because there is no reason to cut it:
| Unused English Dialogue | Unused Japanese Dialogue |
|
Phoenix:
Gumshoe:
Phoenix: |
Naruhodo:
Itonokogiri:
Naruhodo: |
Dialogue #4
Location: Detention center.
Context: Before receiving Maya's cellphone.
| Unused English Dialogue | Unused Japanese Dialogue |
|
Phoenix:
Maya:
It has a recording of the Say...
If I listened to that, |
Naruhodo:
Mayoi:
あれには、お姉ちゃんと そうか・・・・考えてみたら、
あれがあれば、またお姉ちゃんの |
Commentary: This dialogue probably occurred when you showed Maya her memo. However, the final game features the following dialogue:
| Regular Dialogue |
|
Phoenix:
Maya:
Phoenix:
(I'll have to try to |
Actually, it creates a contradiction. This dialogue can occur before meeting Gumshoe at the office. When the player encounters him there, his name box displays "???" instead of "Gumshoe." Then, the player is prompted to select the detective's name. This error has been fixed in the Japanese NDS version. When the game was ported to the NDS, the scripts were updated. However, it appears that the localization team received the older scripts from the GBA version.
Unused Dialogues: Case 2, Day 2, Court
Dialogue #1
Location: District Court, Courtroom No. 1.
Context: When the player presses April May during her second cross-examination.
Commentary: The following unused dialogue was intended to occur during April May's second cross-examination. It would start after the player pressed her at this statement:
| Regular Dialogue |
|
May: |
| Unused English Dialogue | Unused Japanese Dialogue |
|
Phoenix:
Edgeworth:
The area that can be
The killer was here.
Now, if the victim were to
Phoenix:
Judge:
Will the witness please |
Naruhodo:
Mitsurugi:
ホテルから目撃できる
犯人はここ、
被害者が壁ぞいに、出口のドアへ
Naruhodo:
Judge:
・・・・証人? |
The final version of the game uses this dialogue instead:
| Regular Dialogue |
|
Phoenix:
May:
Um... which hand do I
Right! It was my right
Edgeworth: |
Note that in the unused dialogue the fact that Mia runs to the right is pointed out by Edgeworth.
In the final version of the game this contradiction is mentioned by Wright, and it is now part of the objection dialogue that occurs during White's cross-examination on the following day, when you present the "May Testimony" evidence to him (the dialogue is long, so below is just a relevant snippet):
| Regular Dialogue |
|
Phoenix:
Mr. White, you've
White:
Phoenix:
But that directly contradicts
She clearly stated that the
White:
Oh hoh hoh. It is simple.
Phoenix: Look at the floor plans... The killer was here. And the victim, here.
If the victim ran to the
She would have been running
She would have been running Don't you find that odd? |
Unused Dialogues: Case 2, Day 2, Investigation
Dialogue #1
Location: Grossberg Law Offices.
Context: When the player returns to Grossberg Law Offices after obtaining White's photo.
| Unused English Dialogue | Unused Japanese Dialogue |
|
Phoenix:
I guess Grossberg |
Naruhodo:
センセイ、ー度は |
Dialogue #2
Location: Grossberg Law Offices.
Context: When you return to Grossberg Law Offices after obtaining White's photo.
| Unused English Dialogue | Unused Japanese Dialogue |
|
Phoenix:
Hmm... I wonder if someone |
Naruhodo:
1枚、借りていること、 |
Commentary: In the final game the player gets only this observation:
| Regular Dialogue |
|
Phoenix:
(Huh? No more photos |
Unused Dialogues: Case 3, Day 1, Investigation
This script file is somewhat unique compared to other script files. All the unused dialogues, except for dialogue #8, are grouped together in one section of the script. This is actually the way investigation dialogues are usually stored in the game files: all text blocks related to a particular location and time are placed one after another and are preceded by the time and the location name (displayed when you visit a location). All the unused dialogues that follow belong to such sections.
The dialogue here portrays the encounter with Gumshoe quite differently. Based on all the unused dialogue, the story in this chapter — and possibly the entire episode — would have been quite different from the final game.
This section also contains a regular dialogue from the final game, but the game uses a different copy from another section.
I have managed to restore this early encounter, you can see most of the dialogue below in this video. Note that the "Your Name" question is not used in the game. See the "Unused Questions" section for more information.
Dialogue #1
Location: Outside Studio One (the road with the "Welcome" sign).
Context: When you talk to Gumshoe at that location.
Commentary: This dialogue occurred when you met Gumshoe outside Studio One. Supposedly, it was a separate question.
| Unused English Dialogue | Unused Japanese Dialogue |
|
Maya:
What was your name
Gumshoe:
Phoenix:
Maya:
Phoenix:
Still, I like "Gumshoe."
Gumshoe:
Maya:
Phoenix:
(Got to remember, Detective |
Mayoi:
名前、何でしたっけ。
Itonokogiri:
Naruhodo:
Mayoi:
Naruhodo:
イトノコギリ・・・・。
Itonokogiri:
Mayoi:
Naruhodo:
(・・・・ちょっと、気をつけた |
Perhaps the developers just didn't like the jokes or how the exchange sounded overall. As Rubia said in her blog, the dialogue breaks the fourth wall, so perhaps that's why they cut it.
Dialogue #2
Location: Outside Studio One (the road with the "Welcome" sign).
Context: When you talk to Gumshoe at that location.
Commentary: Judging from the text, it was the answer to the question "The investigation", just like in the final game:
| Unused English Dialogue | Unused Japanese Dialogue |
|
Phoenix:
Gumshoe:
Maya:
You might try being a little
Gumshoe:
We have hard proof!
Phoenix:
Gumshoe:
A photo of the Steel Samurai
Maya:
Gumshoe:
Phoenix:
Maya:
Phoenix:
Only one person went to the
If they can prove that was
Maya: Maybe he's lying to us? |
Naruhodo:
Itonokogiri:
Mayoi:
さすがに、そんなにストレ一トに
Itonokogiri:
こっちには、決定的な証拠写真が
Naruhodo:
Itonokogiri:
あのトノサマン野郎が、
Mayoi:
Itonokogiri:
Naruhodo:
Mayoi:
Naruhodo:
事件が起こるまでに、現場に行った
それが荷星さんだと立証されたら、
Mayoi:
あたしたちに、 |
Note how Gumshoe says "Yessir!" to Phoenix. In the final game the question remained the same, but the dialogue itself changed significantly:
| Regular Dialogue |
|
Phoenix:
Gumshoe:
Maya:
Maybe you need to be a little
Phoenix:
Gumshoe:
Phoenix:
Gumshoe:
Sorry about what happened
Autopsy Report added to |
In the retail game Gumshoe mentions the photo in another dialogue, "Decisive Evidence":
| Regular Dialogue |
|
Phoenix:
Gumshoe:
The photo of the Steel Samurai
Maya:
Gumshoe:
Maya:
Gumshoe:
Maya:
Nick, he has evidence!
Phoenix:
Gumshoe: |
Dialogue #3
Location: Outside Studio One (the road with the "Welcome" sign).
Context: When you talk to Gumshoe at that location.
Commentary: This one was also a question to Gumshoe:
| Unused English Dialogue | Unused Japanese Dialogue |
|
Maya:
Gumshoe:
Phoenix:
(I'm cursed.)
Maya:
I was wondering something
You know Edgeworth from
Gumshoe:
Phoenix:
Maya:
Gumshoe:
Phoenix: |
Mayoi:
Itonokogiri:
Naruhodo:
(なんか、宿命みたいなものを
Mayoi:
この前の裁判で思ったんだけど、
なるほどくんて、
Itonokogiri:
Naruhodo:
Mayoi:
Itonokogiri:
Naruhodo: |
The omission of this dialogue is pretty strange. Either they forgot to add it back to the new script block or they didn't want to reveal who was going to be the player's opponent in that case.
Dialogue #4
Location: Outside Studio One (the road with the "Welcome" sign).
Context: When you talk to Gumshoe at that location.
Commentary: It is unclear whether this dialogue was a separate question or if it occurred when the player investigated the location. In the script file the cut dialogue is placed between the other two deleted questions. Therefore, it is highly likely that it was originally a question:
| Unused English Dialogue | Unused Japanese Dialogue |
|
Maya:
Do you know what's
Gumshoe:
Some of the big wigs from
They're working out a strategy |
Mayoi:
その道の先には、
Itonokogiri:
警察のエラい人たちが、 対策を練ってるッス。 |
Note the "see" in Gumshoe's speech. In the final game a similar dialogue goes like this (it starts when the player examines the road that leads to Studio Two):
| Regular Dialogue |
|
Phoenix:
It looks like a tree
Gumshoe:
There's nothing down
That's where Studio Two They don't use it now, though. |
It seems that in the early version that road led somewhere other than Studio Two..
Dialogue #5
Location: Studio One Entrance (the road with the "Welcome" sign).
Context: Upon examining an old signpost (in the final game it would be replaced by the Monkey mascot).
| Unused English Dialogue | Unused Japanese Dialogue |
|
Phoenix:
"Right: To Studio One |
Naruhodo:
《右 ・・・・ 第1撮影スタジオ |
Commentary: It looks like there was no mascot in the early version, at least at that location. Instead there was just an old signpost. In the final game this dialogue was replaced with a longer one:
| Regular Dialogue |
|
Phoenix:
I guess it's a monkey
But what kind of monkey has
He's holding a sign
"Right: To Studio One
Maya:
Gumshoe:
It took that tree down |
If there was no Monkey mascot it means its head didn't block the path between Studio Two and Studio One... which in turn means the whole story in this episode might have been much different than in the final game — the fact that the road is blocked affects the whole case.
Dialogue #6
Location: Outside Studio One (the road with the "Welcome" sign).
Context: When the player examines something behind Gumshoe.
| Unused English Dialogue | Unused Japanese Dialogue |
|
Phoenix: |
Naruhodo: |
Commentary: Characters in the Ace Attorney series cannot physically prevent the player from examining a location. The only exception is a scene from the second episode, where Gumshoe does block the crime scene, but this was clearly an oversight.
Dialogue #7
Location: Outside Studio One (the road with the "Welcome" sign).
Context: Upon examining an infrared sensor (replaced by a security camera in the final game).
Commentary: Have you ever wondered how the security camera was able to take photos of people passing through the gates at Global Studios? Well, originally the security camera was meant to be an infrared sensor:
| Unused English Dialogue | Unused Japanese Dialogue |
|
Phoenix:
This counts the number of
The data is probably stored
There's a number on the |
Naruhodo:
赤外線カウンタ一装置だ。
デ一タは、どこか別の場所で
装置に、プレ一トが貼ってある。 |
It appears the infrared sensor had the "ST1-CNT" number. By comparison, the final dialogue goes as follows:
| Regular Dialogue |
|
Phoenix:
Gumshoe:
All you have to do is look
Phoenix:
That must be the |
Dialogue #8
Location: Global Studios — Main Gate
Context: After the player uses the guard station computer.
| Unused English Dialogue | Unused Japanese Dialogue |
|
Phoenix:
No point fiddling with this |
Naruhodo:
事件当日のデ一タはいただいたし、 |
Commentary: This text would appear upon examining the computer at the studio entrance. It suggests that originally the chapter continued after the main characters had obtained some "data". In the final game, however, it ends right after they get the security camera photo of Steel Samurai. Note the word "data". It most definitely wasn't the photo that Gumshoe was talking about in dialogue #2, since the security camera is never mentioned in the deleted dialogues. What it was remains unknown.
Dialogue #9
Location: Outside Studio One (the road with the "Welcome" sign).
Context: When you present Gumshoe any non-relevant evidence.
| Unused English Dialogue | Unused Japanese Dialogue |
|
Gumshoe: |
Itonokogiri: |
Commentary: In the final version his reaction is different:
| Regular Dialogue |
|
Phoenix:
Gumshoe: |
Unused Dialogues: Case 3, Day 2, Investigation
Dialogue #1
Location: Studio — Main Gate.
Context: When the player examines the guard post after hearing a rattle in the trailer.
| Unused English Dialogue | Unused Japanese Dialogue |
|
Phoenix:
I can see the computer that
Penny:
The security lady would
Phoenix: (Maybe next time...) |
Naruhodo:
セキュリティを管理する
Yumiko:
私、あのオバチャンに
Naruhodo: (どうも、今はムリみたいだな) |
Commentary: There are two instances of the above dialogue in the game. One is used, and the other is not. The only difference between them is the addition of the last line:
| Additional Unused Line |
|
Phoenix: (Maybe next time...) |
This dialogue occurred when the player examined the guard station after the main characters had heard a noise in the trailer. As you can see, the last line reflects that event. Yet in the final game this dialogue is not used. Most surprisingly, it was specifically added for the DS re-release, but the English version doesn't use it. I suppose this is another oversight from the developers (I wonder if the Japanese version uses it).
Dialogue #2
Location: Employee area.
Context: When the player examines the drain with channeled Mia.
| Unused English Dialogue | Unused Japanese Dialogue |
|
Mia:
Phoenix:
Mia:
Phoenix: |
Chihiro:
Naruhodo:
Chihiro:
Naruhodo: |
Commentary: Once again this is probably another instance of oversight. In the final game we get the same observation Phoenix does when he is followed by Maya:
| Regular Dialogue |
|
Phoenix:
He didn't waste any time |
Unused Dialogues: Case 4, Day 1, Investigation
Dialogue #1
Location: Gourd Lake Park entrance.
Context: The first meeting with Gumshoe.
| Unused English Dialogue | Unused Japanese Dialogue |
|
Gumshoe:
Gumshoe: |
Itonokogiri:
Itonokogiri: |
Commentary: This reply was intended to occur when the player showed Gumshoe irrelevant evidence during their initial encounter in the fourth episode. However, since the player only has "Attorney's Badge" at that point (which triggers unique dialogue), and Gumshoe leaves immediately afterward, the reply goes unused. Note that the player meets Gumshoe later in the game, but receives a completely new reply instead of this one.
Unused Dialogues: Case 4, Day 2, Investigation
Dialogue #1
Location: Caretaker's Shack.
Context: When the player presented the "Safe" evidence to the old man, which was later removed.
| Unused English Dialogue | Unused Japanese Dialogue |
|
Oldman:
Maya:
Phoenix: |
Oldman:
Mayoi:
Naruhodo: |
Commentary: The old man's safe was originally an obtainable evidence, and the following conversation occurred when the player showed it to him. The "Safe" evidence is described in the "Unused Evidence — Safe" section.
Unused Dialogues: Case 4, Day 3, Court
Dialogue #1
Location: District Court, Courtroom No. 3.
Context: When the player objects to Larry's statement during his first cross-examination.
Commentary: Originally, the following statement...
| Regular Dialogue |
|
Larry: |
...started a "fake" objection dialogue, supposedly triggered by the "Lake Photo" evidence. This video shows how it was supposed to go:
| Unused English Dialogue | Unused Japanese Dialogue |
|
Phoenix:
Look at this picture, Larry!
There was a boat on the
Judge:
Larry:
I wasn't really paying that
I'm not saying there
von Karma:
The defense has pointed
Judge:
Judge:
Mr. Butz, you may continue
Phoenix:
Maya:
Phoenix: |
Naruhodo:
しかし、この写真を
銃声があったとき、
Judge:
Yahari:
オレ、そんなに注意して
ボ一トが“なかった”とは
Karuma:
弁護人の指摘は、
Judge:
Judge:
証人。・・・・証言に
Naruhodo:
Mayoi:
Naruhodo: |
As you can see, it was a red herring of sorts. If I recall correctly, this trick is rarely used in the main series. The developers probably ditched it because they didn't want to confuse players. Then again, it could just be another bug or oversight.
Unused Dialogues: Case 5, Day 2, Investigation
Three dialogues in this section are early versions of the regular dialogues that appear in the game. However, this is only true for the English script. In the Japanese script, there are no differences between the two. Looking at the English dialogues makes it clear that they are not an early translation attempt; there are crucial differences between the unused and regular dialogues. Perhaps the Japanese script file was modified after being sent to the translation team. For this reason, a regular English dialogue will be provided for comparison.
Dialogue #1
Location: The Evidence Room.
Context: When the player sprays Marshall's locker with luminol.
| Early English Dialogue | Regular English Dialogue |
|
Ema:
Phoenix:
(This could be a big clue!)
Gumshoe:
Ema:
It's called Luminol Testing
Gumshoe:
Ema:
Gumshoe:
I'll go borrow $50 from
Phoenix:
Ema:
Phoenix: |
Ema:
Phoenix:
(This just might be something
Gumshoe:
That's some pretty amazing
Ema:
It's called "Luminol Testing
Gumshoe:
Ema:
Gumshoe:
I'll just borrow 50 bucks from
Phoenix:
Ema:
Phoenix: |
Dialogue #2
Location: The Evidence Room.
Context: When the player sprays Gumshoe's locker with luminol.
| Early English Dialogue | Regular English Dialogue |
|
Ema:
It's a handprint!
Gumshoe:
Phoenix:
Gumshoe:
Ema:
Gumshoe:
I want you to testify for me,
Phoenix:
Gumshoe:
Ema: |
Ema:
Gumshoe:
Phoenix:
Gumshoe:
Ema:
Gumshoe:
You have to help me...
Promise you'll testify that I
You'll do that for me, won't
Phoenix:
Gumshoe:
Ema: |
Dialogue #3
Location: The Evidence Room.
Context: When the player sprays the area near the broken vase shards.
| Early English Dialogue | Regular English Dialogue |
|
Phoenix:
What's your opinion, Detective
Gumshoe:
Maybe, just maybe...
Ema:
Phoenix:
Gumshoe: |
Phoenix:
I'm not a professional.
Gumshoe: Maybe Detective Goodman...
was actually an alien?
Ema:
Phoenix:
Gumshoe: |
Unused Dialogues: Case 5, Day 3, Investigation
Dialogue #1
Location: Gant's Office.
Context: When the player examines a piece of paper found inside Gant's table.
| Unused English Dialogue | Unused Japanese Dialogue |
|
Phoenix:
Gumshoe:
Phoenix: No, it's nothing.
Ema:
Phoenix: |
Naruhodo:
Itonokogiri:
Naruhodo: い、いえ。なんでもありません。
Akane:
Naruhodo: |
Commentary: This is an early version of the dialogue that appears in the final game:
| Regular Dialogue |
|
Phoenix:
Ema:
Phoenix: Huh? Oh. No, it's nothing.
Ema:
Phoenix: |
Note that Gumshoe had a line in the unused dialogue, but was replaced by Ema in the final version. However, the line itself remained the same.
Unused dialogues during 3D Evidence examination
Just a quick note: there are two types of 3D evidence dialogues. The first occurs when Phoenix is with Ema, and the second occurs when he is alone. Both types occur when the player examines evidence in 3D mode in the fifth episode. Since the player can examine evidence in 3D mode anywhere and at any time during the fifth episode, there is no need to mention the location or context.
Dialogue #1
| Unused English Dialogue | Unused Japanese Dialogue |
|
Phoenix:
At least for once he's got a |
Naruhodo:
めずらしく、ヒゲがつるつるに |
Commentary: This dialogue was intended to occur when the player examined Gumshoe's ID card without Ema present. However, in the final game, the player only has the card for a short time. Since Ema never leaves Phoenix while the player has the card, it is not possible to activate this dialogue.
Dialogue #2
| Unused English Dialogue | Unused Japanese Dialogue |
|
Ema:
Phoenix:
Ema:
Phoenix:
Ema:
Phoenix:
Ema:
Phoenix: |
Akane:
Naruhodo:
Akane:
Naruhodo:
Akane:
Naruhodo:
Akane:
Naruhodo: |
Commentary: Originally players could examine the tape with the security footage of the Evidence Room in 3. Its model and texture can be found in the game files (see the "Unused 3D Models" section). In the final game, however, the developers either forgot to activate this feature or intentionally disabled it.
Dialogue #3
| Unused English Dialogue | Unused Japanese Dialogue |
|
Phoenix:
I wonder what the 12 steps |
Naruhodo:
この事件が解決したら、 |
Commentary: This description of the tape occurred when Ema was not with Phoenix.
Dialogue #4
| Unused English Dialogue | Unused Japanese Dialogue |
|
Ema:
Phoenix:
Are you absolutely sure this
Ema:
Phoenix:
Phoenix: |
Akane:
Naruhodo:
このマフラ一・・・・ まちがいなく、
Akane:
Naruhodo:
Naruhodo: |
Commentary: This dialogue occurred when the player examined Lana's muffler (scarf) in 3D, which was later removed from the game (see the "Unused 3D Models" section for more information).
Missing text in the English version
For some unknown reason, all English versions of the game except the iOS and Java2ME ports are missing the following lines at the beginning of the first case (asterisks indicate removed lines):
| English Dialogue | Japanese Dialogue |
|
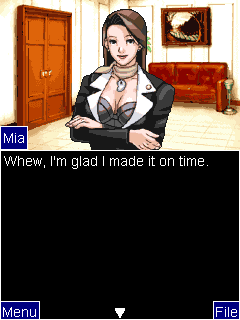
Mia:
(*)So, this is it...
Phoenix:
Mia:
Phoenix: (*)Y'know, Chief...
(*)I'm sorry you had to come
Mia:
Mia:
Not everyone takes on a |
Chihiro:
どうかしら? 初めての法廷は。
Naruhodo:
Chihiro:
Naruhodo: あの‥‥所長。
今日は、すみません。
Chihiro:
Chihiro:
初めての法廷で殺人事件をあつかう |
Note 1: This line is a mistranslation: actually, Phoenix talks about his junior school trial with Edgeworth and Larry.
Note 2: This line is still missing in the iOS port.
Note 3: This line has different translations in various versions. The iOS port uses the DS translation.
| English Dialogue | Japanese Dialogue |
|
Phoenix:
(*)I passed the bar three months ago. Here's the story:
My first case is |
Naruhodo:
3ヶ月前に弁護士になったばかり。 さて。
今回の事件は、 |
Note 4: This line is still missing in the iOS port.
The reason those lines appear only in Java2ME and iOS ports (see the Java2ME Port section for more information) is because all the script files for these versions were redone from scratch. That is why the iOS port has so many typos and missing text. All the other versions used the DS scripts as the basis.
Even though all the European localizations are derived from the English translation, they still retain all the missing lines.
Missing text in the Japanese version
The following Japanese lines that appear after Phoenix accuses Karma of murder in the fourth episode were present in the GBA version, but were removed in subsequent ports starting from the DS re-release (asterisks indicates removed lines):
| English Dialogue | Japanese Dialogue |
|
Karma:
Judge: ...
Judge:
Karma:
Judge:
Karma:
I see no need.
Phoenix: |
Karuma:
Judge:
(*)・・・・・・・・
Judge:
Karuma:
Judge:
Karuma:
(*)その必要はあるまい。
Naruhodo: |
However, they were left in the English version. This is another telltale sign that the English localization is based on the original GBA scripts rather than the updated DS ones (see the Trivia section).
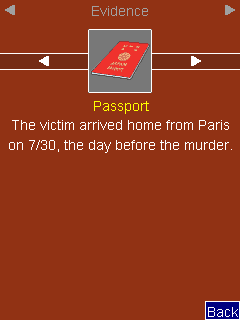
Unused Evidence
In the Japanese version of Ace Attorney for the Nintendo DS/3DS each item in the Court Record is comprised of two icons and two separate boxes (images) that contain caption/age and description data respectively.

The English version stores icons and captions in the same way, but since English text requires more space, the descriptions were given new broader boxes, while the original description boxes where repurposed to contain the age data and additional information not found in the Japanese version.

Items that only appear on the upper screen have smaller versions of their icons, too. The smaller icons are only used to represent evidence in the court record. However, they were never intended for actual use. The developers simply converted all the large icons into smaller ones and never bothered to remove them.
Case 2 — Portable Safe
Caption (JAP), Description (JAP):
Commentary: Those are most likely the remnants of the Portable Safe evidence mentioned in the "Unused Dialogues: Case 2, Day 1, Investigation" and "Unused Graphics (3DS) — Portable Safe and Clock" sections.
Do not confuse it with a similar evidence from the fourth episode (see below): this one uses kanji, while that one is written in katakana.
This caption has no English translation in the DS and 3DS versions, but it was translated as "safe" in the Trilogy HD re-release
Case 3 — Empty Steak Plate
Caption (JAP), Description (JAP), Small Icon (not used):(Empty Steak Plate)
Commentary: In earlier drafts of the script, it's quite possible that the player could have obtained the empty steak plate from outside the trailer, in addition to the steak plate from the employee area.
This caption does not have an English translation in the DSwas mistranslated as and 3DS versions. However, in the Trilogy HD re-release, it was mistranslated as "Steak Plate."
Case 4 — Safe
Caption (ENG/JAP):

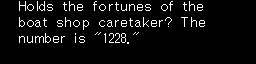
boat shop caretaker? The
number is "1228."
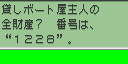
全財産? 番号は、
"1228"。
Commentary: The old man's safe was originally an obtainable item. Judging from this description, the main characters already knew the safe's code by that point in the story. Although the evidence was cut, the large icon remained in use.
The Japanese name of this item uses katakana, probably to differentiate it from the above mentioned Portable Safe from the second episode, which had the same name, but was written in kanji instead.
The game script contains an unused dialogue related to this evidence (see the "Unused Dialogues: Case 4, Day 2, Investigation" section).
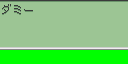
Case 4 — Angry Missile
Caption/Description (JAP), Small Icon (not used):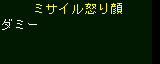
ダミー (Dummy)
Commentary: This caption is only found in the GBA version. It refers to the icon of Missile looking angry.
Case 5 — Contradiction Award
Caption (ENG/JAP):

Commentary: In the DS version, all evidence has two captions, one for the top screen and one for the bottom screen. The English "Contradiction Award" caption is only found among those for the upper screen.
It is most likely the original name of the "King of Prosecutors" trophy. In the Japanese version, it is called "Kenji of the Year" (kenji means "prosecutor"). They localized it as "King of Prosecutors" in the English version to explain the "K" on the trophy. Later in the story, Edgeworth explains why the trophy consists of a shield and a halberd (actually it is a spear, don't know why they mistranslated it as halberd). It is revealed that the trophy symbolizes a "contradiction." A fitting name for this trophy.
Case 5 — Transferal Request
Caption (ENG/JAP):


Description (ENG/JAP):

Submitted by Detective Goodman.
Touch the Check Button for deta[ils.]
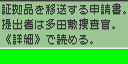
堤出者は多田敷捜査官。
《詳細》 で読める。
Note: The graphics in the description are already misaligned. This is not due to incorrect extraction.
Commentary: It appears this was an earlier version of Goodman's "Lost Item Report" evidence. Apparently, the player could also view it.
Dummy Icons
The big and small dummy icons from the fifth case containing the word 血痕 / Bloodstain.
These icons are assigned to five unused evidence slots found in "Rise from the Ashes", each of which, when activated, reuse Mia's profile description.
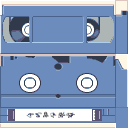
Unused 3D Models
The screenshots of the unused 3D models were taken from the 3DS version of Ace Attorney Trilogy, while the textures were extracted from the DS version. The 3DS re-release uses the same 3D models and textures as the DS version. While the 3D models fared well, the Trilogy re-release's image format caused the textures to become riddled with compression artifacts. For this reason, the textures below are from the DS version.
Lana's Muffler
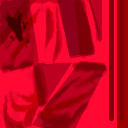
Note: For some reason the DS version contains two instances of the muffler texture.
Note 2: This evidence has no caption graphics, but in the game it is referred to as Lana's muffler or simply as a muffler or scarf.
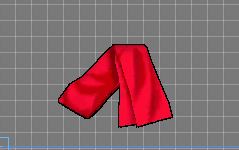
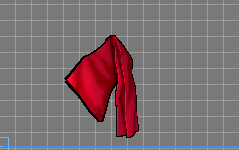
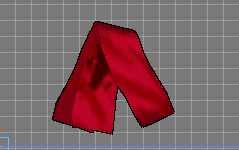
Commentary: The game contains an unused 3D model of Lana's scarf. There are three additional images: two large icons for the top and bottom screens, which are identical, and a small icon for the Court Record menu. However, only the top screen icon is used in the final game.

The muffler has a bloody spot on its inner side that probably triggered the aforementioned dialogue.
I guess the player received this evidence alongside the "Switchblade Knife" that Gant brought. Since it served no further purpose in the story, the developers decided to remove it.
There is also a corresponding dialogue related to this item (see the "Unused dialogues during 3D Evidence examination" section).
Security Video
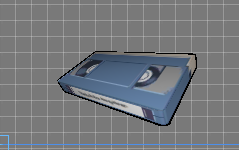
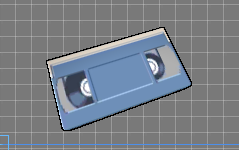
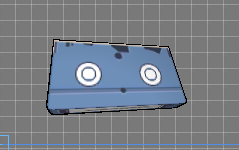
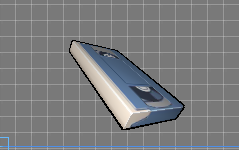

Commentary: Originally it was possible to examine the tape with the security camera footage in 3D mode. There were two related dialogues (see here and here). In the final game, however, it is only possible to view the corresponding video.
SL-9 Incident Files
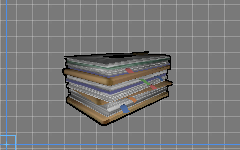
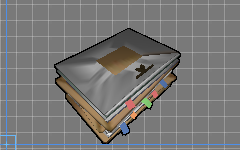

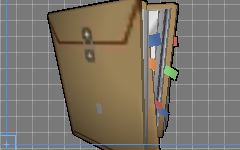
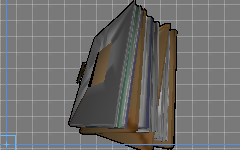
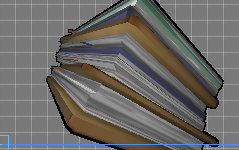
Note: The 3D objects below come from a different set of files, but they are part of the main 3D model because they all use the same textures.
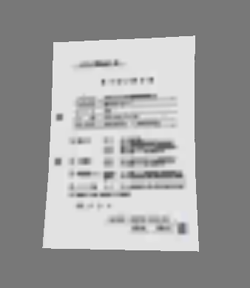


Commentary: It seems the SL-9 Incident Files evidence had its own 3D model. In the final version, players can only read a summary of the incident. It should be noted that the 3D model's overall appearance differs from the evidence icon used in the final game/
As you can see, the icon depicts a stack of documents with Paper 1 on top, while the 3D model has a package on top. The screenshot above shows that Paper 1 is actually part of the package. Perhaps the player had to examine the package to reveal Paper 1.
There is also a Paper 2, but its placement in the stack of documents is unclear, as is whether it was used at all. It could just be a prop.
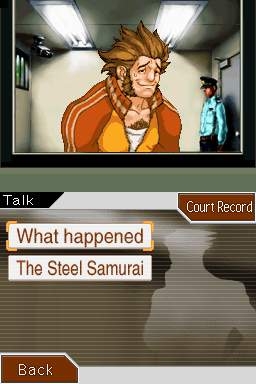
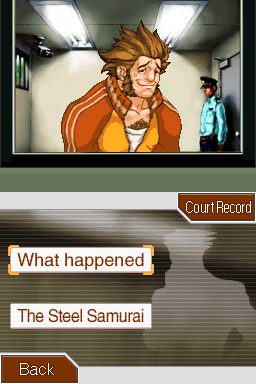
Unused Questions
Questions appear on the bottom screen when you talk to characters during investigations.
Graphics of the same type are usually grouped together. "Question" and "Answer" graphics are mostly sorted based on their order of appearance in the game, though there are some exceptions.


This is the only unused question. There are two instances of it in the game resources. The first appears at the beginning of the "Questions" section, right before the "What Happened" and "You and the Chief" questions. These questions appear during the first encounter with Maya. This means that originally, the player could ask Maya three questions instead of two. It looks like this option was removed to streamline the game. In the end, Maya mentions her name right before the player can talk to her.
The second instance can be found between the "The director, at al." and "The producer" questions from Case 3. Some of the preceding questions are from the conversation with Penny Nicols and the following questions appear when you meet Sal Manella. "Your Name" could fit both events, but it is most likely a remnant from an early version of the encounter with Gumshoe (see the "Unused Dialogues: Case 3, Day 1, Investigation" section), where one of the dialogues begins with the words "Um, Detective? What was your name again? Bobby, was it?".
Unused Choices
Choices mostly appear on the bottom screen during court proceedings and affect the course of actions.


"Don't disturb the scene" has no corresponding Japanese graphics.


It seems they were used during Mike Meekins' cross-examination. I guess those answers appeared when Edgeworth asked Wright if there was something wrong with the security video. "Prove with evidence" could have been a red herring.


On the last day of the trial, Gant appears in court and informs everyone that Lana has something important to say. She then goes to the stand, asks the court if she may make a statement, and the judge agrees. Those answers suggest that it was up to the player to decide whether to allow her to speak.
Unused Hints
These hints appear at the top of the screen during certain events. For example, they appear when you have to choose between two or three answers and are prompted to "Choose your answer."


Unused Graphics (GBA)
Note: The GBA release includes all of the unused content from the DS version. The images below are only found in the GBA version.
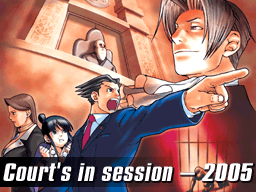
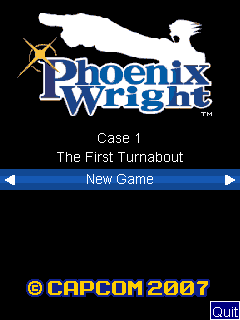
Demo Version Images
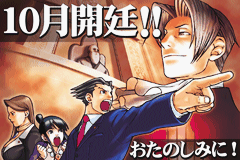
The lefover title and end-game images from the demo version.
Unused Graphics (DS)
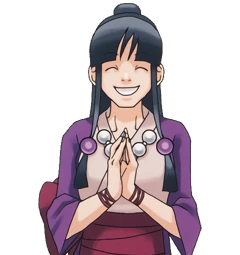
Demo Version Image
The DS version also features the ending screen from the demo version, albeit in English. Note that Maya's mouth is now closed — this is how she appears in the official artwork.
Unlock all Episodes Prompt
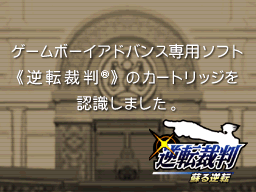
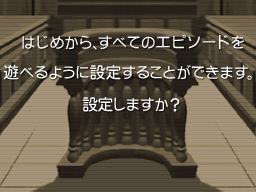
The Japanese version allows to unlock all episodes if the GBA version of Gyakuten Saiban is inserted into the GBA cartridge slot. And while this feature was removed from the DS version (which was the first release of the game outside Japan), the corresponding images were left in.
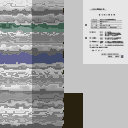
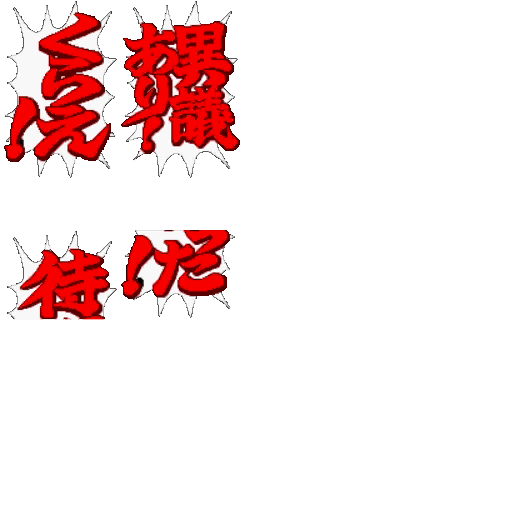
Japanese GBA Bubbles
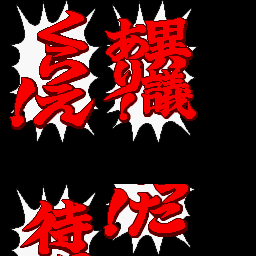
The DS version contains the Japanese bubbles from the GBA version. They are stored as a single image rather then as tiled sprites. Since it lacks any palette, I had to use the GBA bubbles palette. This image also appears in the 3DS version.
GBA UI Buttons


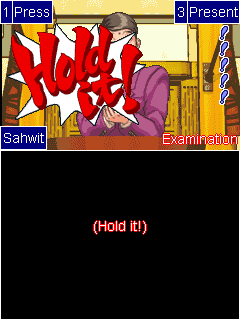
GBA button icons and GBA "Press" and "Present" buttons.
Language Buttons


These buttons are used only in the Japanese version. They allow you to switch the game's language just like in the 3DS version of Ace Attorney Trilogy.
"Rise from the Ashes" Logo
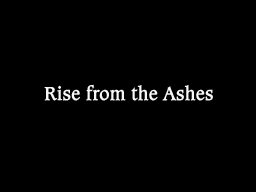
An empty black image that only contains the title of the fifth episode, "Rise from the Ashes", in the center. Strangely, the Japanese version of this image contains no text at all.
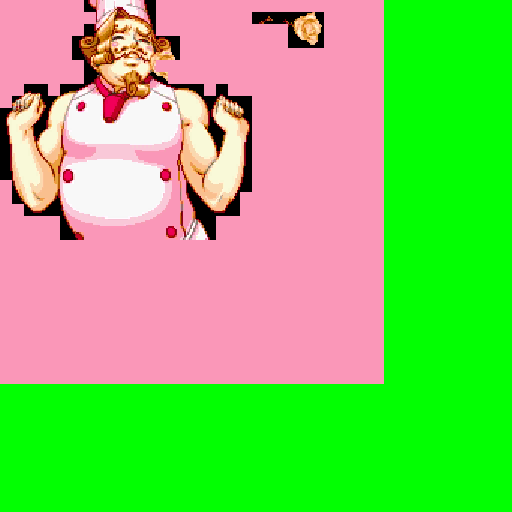
Unused Lunchbox
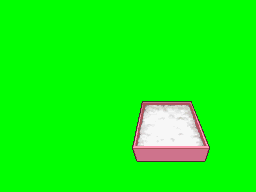
This is an unused lunchbox image featuring plain white rice. It is unclear if it was intended as a standalone lunchbox or if it was simply used as a template for other lunchboxes, such as the "Salmon Swirl." However, the game code has an unused lunchbox slot between the "First Love" and "Quarter Pound of Roast Beef" lunchboxes.
This image also appears in the HD re-release, but unlike its counterparts, it has not been remastered for a higher resolution. Instead, it is a basic upscale of the DS image.
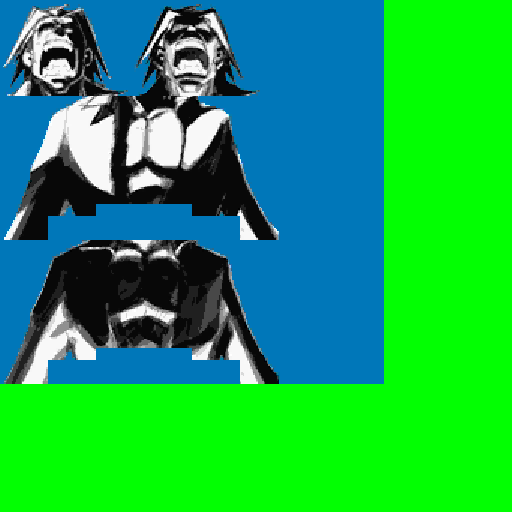
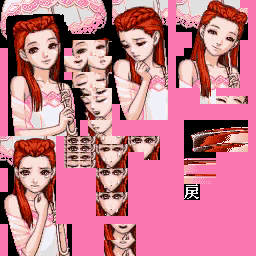
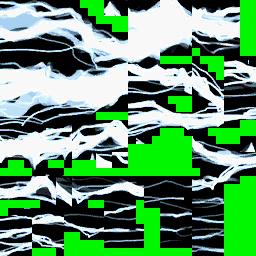
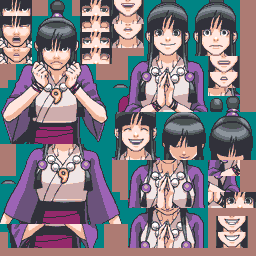
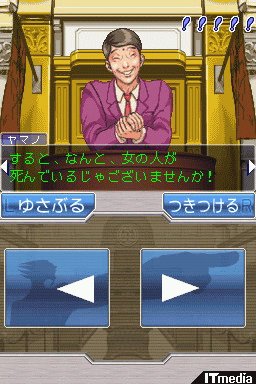
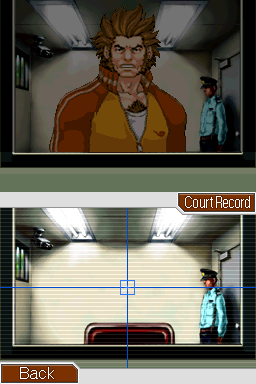
Lower Screen Character Images
The images above could be found in the DS version's resources using any tile editor. While they appear to be legitimate sprites, the real ones are divided into tiles (chunks), which are further compressed. Therefore, there is no way to view them without first decompressing and rebuilding them.
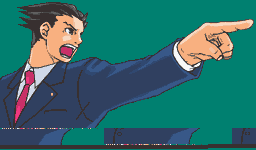
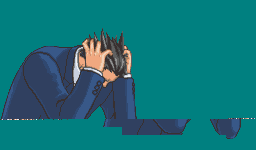
In reality these images were actually intended to appear on the lower screen during various events in the game:
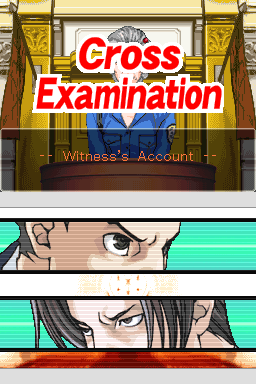
It looks like the other character images were used to reflect the current state of affairs in the courtroom. For instance, when the player was losing, the "Cross Examination" animation would feature Phoenix holding his head and the prosecutor looking smug, both appearing on the bottom screen.
Surprisingly, these images can also be found in the second and third games, as well as in the 3DS port of Ace Attorney Trilogy.
Shout-out to Jau_CR for finding these screenshots in the first place. Without him I would never have solved this mystery.
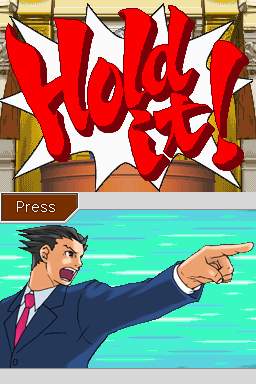
Game Mode Labels
The final game includes several "labels" that were used to identify different game modes in the old UI:


Although the つきつける label says "Present" in Japanese, it was incorrectly translated as "Press" in the English version of the image.
There are several screenshots that show where those labels would appear. See the Early UI Designs section for more information.
Unused Graphics (3DS)
Note: The following images do not appear in the DS version.
Note 2: Many images and sprites exist as multiple redundant copies. Since these are merely leftover assets, they will not be covered here.
Demo Version Images
A logo of the demo version of the game,
Images from the demo version that appeared upon completing it.

Another image from the demo that serves to explain the bottom-screen control scheme.
A notice screen from the demo version.
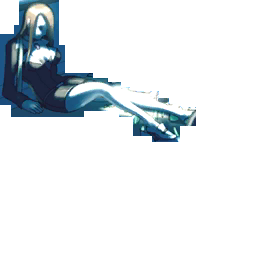
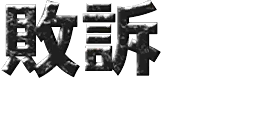
"You lost the case!" Image
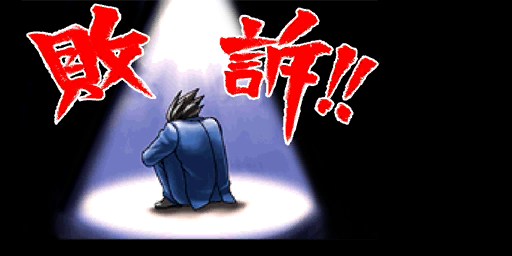
Phoenix is sitting under a spotlight with his back to the viewer, hugging his knees. Note the low resolution of this image; it is directly related to the next one.
Surviban Logo
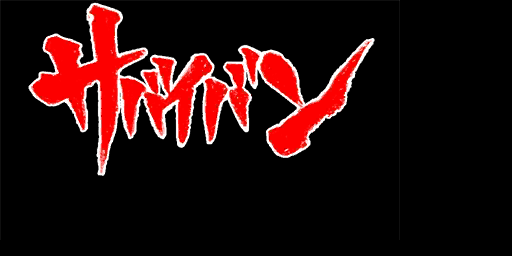
Sabaiban (or Surviban) was the original title of the game — it is a portmanteau of the English "Survival" and the Japanese "Saiban" (trial).
This could well be the original logo from that time, though there is no reason whatsoever for it to appear in the 3DS re-release. Curiously, this image is absent from any other version of the game, including the HD trilogy. Perhaps it's some kind of inside joke?
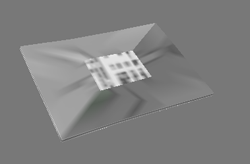
Unknown "glass" Image
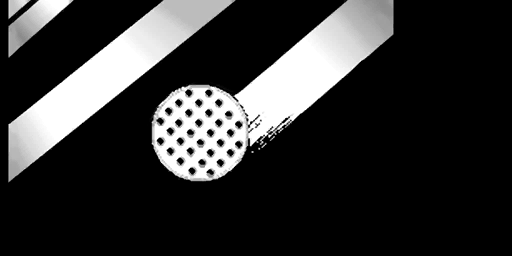
It seems this image was intended as an overlay for the glass pane in the detention center's visitor room. It depicts glass highlights and a "speaker hole" that allows the visitor and the defendant to talk to each other.
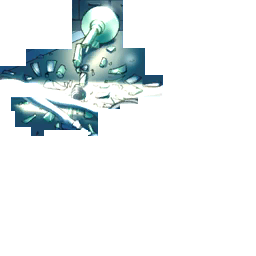
Portable Safe and Clock


The first image was already mentioned in the "Unused Dialogues: Case 2, Day 1, Investigation" section — it is an unused image of a portable safe that was present at the crime scene in Mia's office. It is not clear what role it played in the story — if any.
The second item appears to be a clock. As you may know, the "Turnabout Sisters" episode was supposed to be the first case, and this clock was the original murder weapon (in the final game Mia was killed with the Thinker statue introduced in the first episode, "The First Turnabout").
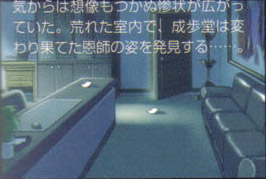
For a while there was no hard evidence that these two items were part of the night office scene, but in 2018, while going through the Gyakuten Saiban Fan Book scans, I accidentally stumbled upon the following images, which proved my theory beyond a doubt:
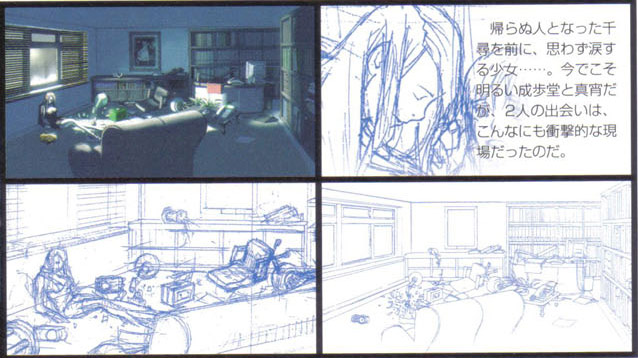
The clock appears in the same place as the Thinker statue in the final game, while the safe is situated to the right of the broken glass stand. Surprisingly, the lower left image (an early draft of that location) features an unknown object to the left of the stand.
There is also concept art of the undamaged office which largely resembles the office in the final game:
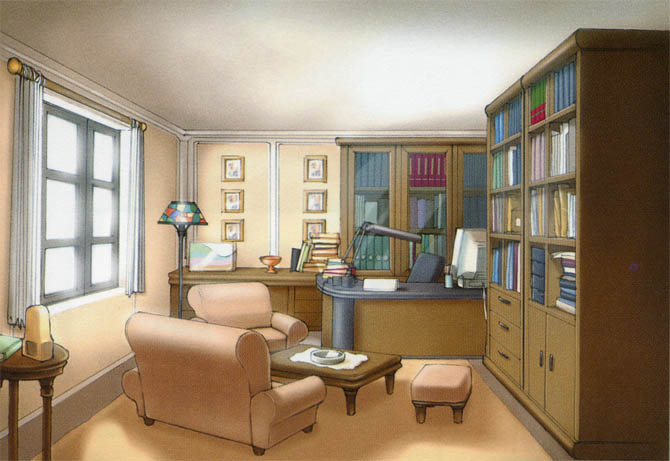
The object on the table to the left is actually the aforementioned clock — the table even appears in the early concept art. And the object next to the light stand is probably the rectangular thing from the early concept art — an aquarium, perhaps?
The 3DS version also includes the following two images:
In the final game Mia's body and the broken stand are part of the background, while these two images suggest that they were intended to be removable assets. Notably, the lower-right drawing also lacks Mia's body. This implies that the night office location was meant to be revisited by the player — but under different circumstances.
For some reason the images of the portable safe and the clock appear only in the 3DS version.
Two Pieces of Paper


Those two pieces of paper were intended to appear outside Mia's office, though their purpose remains unclear. Could they be related to the receipt with Maya's name? Interestingly, the Gyakuten Saiban Fan Book contains an image of the location where these papers are clearly visible:
These images are also exclusive to the 3DS version.
Early Parking Lot Floor Plans
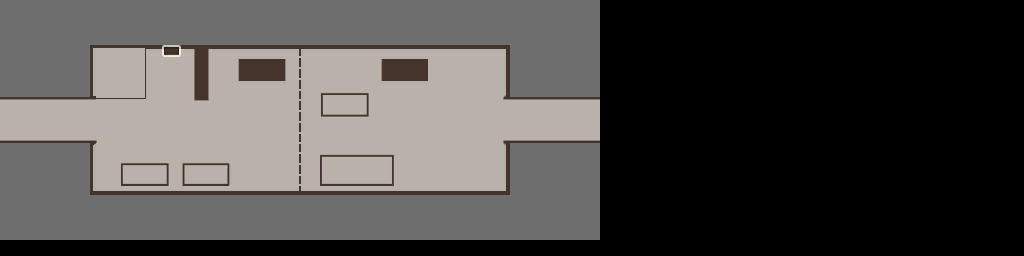
This looks like an early version of the "Parking Lot Floor Plans" from the fifth episode.
Lower Safe Panel w/o keypad
Lower part of the safe from the fifth episode, but without a keypad.
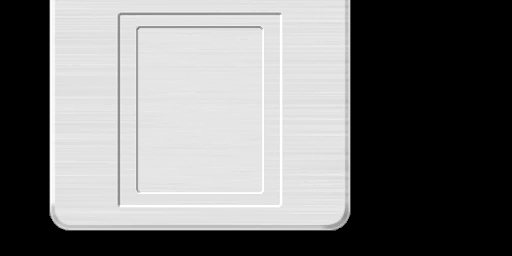
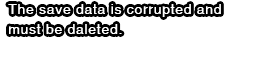
Quit the Game Prompt

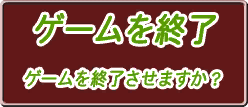
In the final version, you can only quit the game after saving; afterwards, a "Save" screen appears, just like in the DS version. In the mobile ports, however, players can choose between "Save and Exit" or simply saving without quitting. It is likely that this feature was planned for the 3DS port but was cut for unknown reasons.
Placeholders and Test Images
This placeholder is based on the image from the DS version of the game.
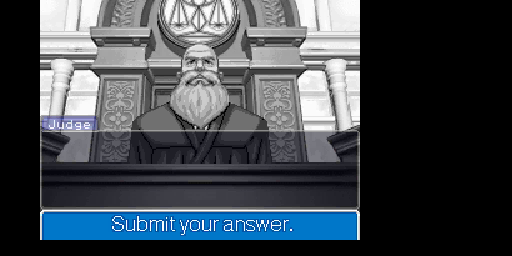
This placeholder is essentially a screenshot from the DS version. For some reason, the hint features a larger font and a blue background. It was probably used for testing purposes.

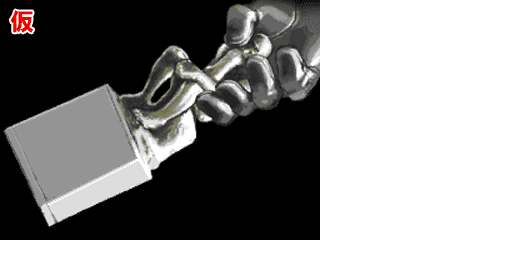
Yet another placeholder, this time featuring a frame from the gavel animation. Notably, it exhibits motion blur — an effect present in the original GBA trilogy but absent from all subsequent re-releases, with the exception of the iOS port.
These are sprites from the DS version that were probably used for testing during the early porting phase:
Dummies and miscellaneous images:


Unused Animations
Throughout this and the following sections a certain release called Gyakuten Saiban Jiten is mentioned.
Gyakuten Saiban Jiten is a bonus Nintendo DS "encyclopedia" cartridge that was included with pre-orders of the Japanese DS version of Gyakuten Saiban 3. It contains information on all characters in the series and allows players to view music, sprite animations, and intro sequences from all three games released up to that point. As a welcome bonus, it features most of the unused animations mentioned below; however, as you will see later, the game's ROM contains even more hidden sprites.
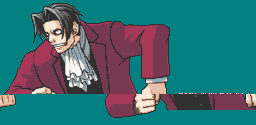
Old Man

He shakes from side to side, like he usually does, then suddenly stops and gets serious.
The animation is actually composed of two sequences, and you can clearly see where the second one begins — where the lower part of his sprite disappears. It also indicates that this animation was only meant to be used during the trial. The same goes for the unused Edgeworth and Butz animations — they both lack the bottom part, because it would be covered by the witness stand.
In Gyakuten Saiban Jiten it is listed as ダメージ(ゲーム未使用) / Damage (unused).
Jake Marshall

This animation is similar to the one used in the game, save for one thing: in the unused animation Jake eventually bites the piece of dried meat off.
.webp)
In Gyakuten Saiban Jiten it is listed as 噛み切る(ゲーム未使用) / Biting off (unused).
Mike Meekins

He just stares and moves his head in a funny way while standing still.
This animation appears in the script files, following the sequence where Meekins screams in shock and jerks his hand sideways. In practice, however, it never actually plays; the game holds the final frame of the previous animation for a set duration before automatically skipping to the next text box. Given the abruptness of the transition, this was likely a deliberate technical workaround.
Curiously, in Gyakuten Saiban Jiten this animation appears as the idle part of another animation called 敬礼 / Salutation.
Ema Sky

Ema moves the red glasses on her face with her left hand up and down.
In Gyakuten Saiban Jiten it is listed as メガネくいくい / Nudging Glasses, but is not marked as unused.
This animation was later featured in Apollo Justice: Ace Attorney in a reworked form, with the glasses appearing on top of the head instead of over the eyes.
Kudos to Tox for discovering it and providing some additional information.
Mia Fey (channeled)

An animation of Mia shaking her head while channeled by Maya as she assists during a trial.
In Gyakuten Saiban Jiten it is listed as 首ふり(助手席) / Head shaking (assistant), but is not marked as unused.
Kudos to Tox for discovering it and providing some additional information.
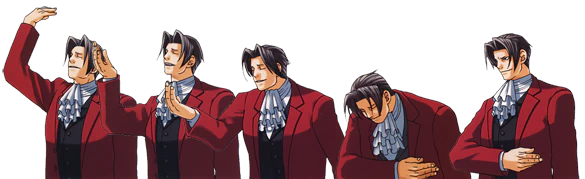
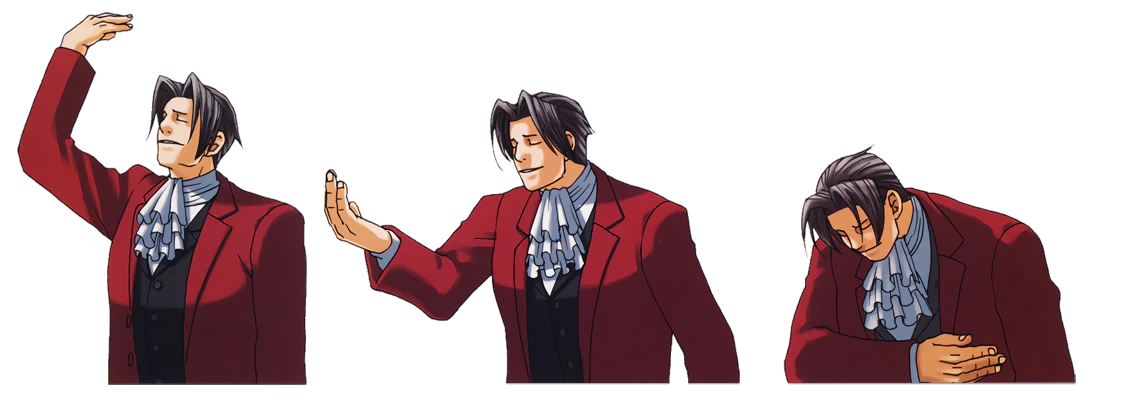
Phoenix Wright (1)

Phoenix Wright has throbbing hearts in place of his eyes.
In the earlier version of the game his first meeting with April May was set to occur during the trial. However, at some point in development, their encounter was moved to the investigation phase, and thus this animation lost its original purpose.
In Gyakuten Saiban Jiten it is listed as ハート(ゲーム未使用) / Hearts (unused).
Phoenix Wright (2)

Originally Phoenix's finger-pointing pose had an extra detail in the Japanese GBA versions of the first two GBA titles: during the talking loop he waved his hand and finger up and down, similarly to what Edgeworth does in his respective animation. However, in Gyakuten Saiban 3 the developers removed the hand waving animation, making both talking and non-talking loops virtually identical.
This was likely a choice driven by artistic rather than technical reasons.
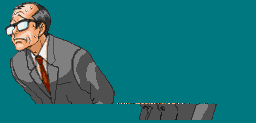
Miles Edgeworth

This is essentially the same damage animation for Edgeworth, but from a front-facing perspective.
The sprite lacks its lower half, suggesting it was intended for Edgeworth’s appearance on the witness stand at the end of the fourth episode. It likely went unused due to the brevity of his cross-examination.
In Gyakuten Saiban Jiten it is listed as ダメージ(ゲーム未使用) / Damage (unused).
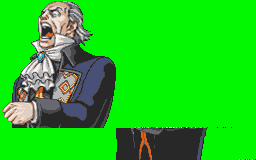
Larry Butz

Larry moves his jaw up and down in quick succession. This is his reaction to being caught in a lie.
In Gyakuten Saiban Jiten it is listed as ダメージ(ゲーム未使用) / Damage (unused).
Unused Sprites
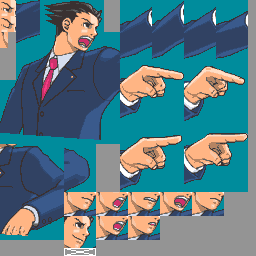
Phoenix Wright
These never-before-seen sprites are similar to the iconic finger-pointing pose, with one key difference: instead of being dead serious, Phoenix wears a smug smile. They were likely part of a previously unknown animation; a possible recreation of which can be seen in the GIF above.
Although these frames are absent from every retail version of the game, they curiously appear in one of Phoenix's tile sheets within the Gyakuten Saiban Jiten ROM.
I suspect that the developers intended to include more cut content in this encyclopedia but ultimately limited it to animations that were already fully implemented in the retail games.
It should also be noted that while the DS and GBA versions store sprites as individual tiles, Gyakuten Saiban Jiten combines them into tile sheets — large images containing all of a sprite's components. Since the developers converted the assets to this new format — presumably to test the waters for the sprite system in the next installment — this may explain why certain unused tiles surfaced here, but not in the original GBA or DS releases.
Kudos to Guiguiba for making this discovery.
Miles Edgeworth
The following two sprites were part of Edgeworth's "bowing" animation, which originally consisted of 5 unique frames, but was reduced to just 3 frames in the final game. Interestingly, in the TGS 2005 Special Court promo video this animation uses 4 unique frames. These two sprites can also be found in the Gyakuten Saiban 3 Fanbook and Art of Gyakuten Saiban.
While these sprites are absent from every retail version of the game, thanks to the keen eye of Guiguiba it was discovered that they also appear inside the Gyakuten Saiban Jiten ROM. Although they can be found in one of Edgeworth's tile sheets, they are not part of the bowing animation featured in the animation player. The GIF above shows how the animation would have appeared in-game had these two sprites been used. Most likely, they were omitted to streamline the animation or to save cartridge space.
The second sprite (or rather pose) eventually appeared in the Ace Attorney Investigations spin-off.
Maya Fey (1)
As with the previous examples, these two sprites — or rather tiles that overlay the mouth area — do not appear in any game, but they can be found in Maya's tile sheet in the Gyakuten Saiban Jiten ROM. One of them also appears in the Art of Gyakuten Saiban under the name うなずき / Nodding.
As the name suggests, these two frames were once part of Maya's "bowing" animation, although it is unclear exactly where they fit into the sequence. The GIF above shows one possible placement for these tiles within the bowing animation.
Kudos to Tox for discovering them in the Gyakuten Saiban Jiten ROM.
Maya Fey (2)
This sprite can only be found in the Art of Gyakuten Saiban (where it is listed as 困惑 / Perplexed), and not in the game itself.
It was likely omitted for being redundant, given that other sprites already conveyed the same sentiment.
Early Sprite Design
First of all, it should be noted that the following images are definitely not character artwork; they were clearly intended for in-game use. Their poses and general similarity to the final sprites further support this claim.
When comparing them, please keep in mind that the hues may not accurately reflect their original appearance, as these frames were obtained from imperfect paper scans.
The images below do not appear in the game files in any form.
Maya Fey
The Art of Gyakuten Saiban lists this sprite under the title フキゲン / Bad Mood. While it may seem identical at first glance, it actually differs significantly from the final version. The fringe features more splits, the face shape is slightly elongated, and the shoulders are less rounded. Additionally, the beads on the necklace are slightly larger, whereas those on the braids appear smaller. The bandage is wrapped in the opposite direction, the side of the robe extends much further below the bandage, and the bow is smaller yet wider, appearing in front of the arm rather than behind it.
You may also have noticed that in this early version, Maya isn't smiling, but looks rather glum. In the final game, she never displays this particular emotion while in this pose.
This sprite also appears in The Art of Gyakuten Saiban under the title 真剣 / Serious. As you can see, it features the same modifications as the sprite above, but also reveals that Maya's sleeves were originally longer and narrower.
It is safe to assume that these changes were made for artistic reasons and to accommodate the color limitations of the Game Boy Advance.
Larry Butz
Larry Butz's crying sprite had two variations of his teary eyes:


His "long sleeve" sprite also had a small detail removed:


Dick Gumshoe
Gyakuten Saiban 3 Fanbook contains an earlier version of Gumshoe's sprite:
This sprite combines elements from two separate expressions found in the final game: Gumshoe's mouth and eyebrows match the first image, while his eyes gaze upward, similar to the second. The collar of his shirt appears more rumpled, and his coat and tie cast different shadows. Moreover, it seems that Gumshoe is holding his hands behind his back.
Mia Fey
Gyakuten Saiban 3 Fanbook also contains an earlier version of Mia's sprite:
In the earlier sprite, she has a different pose and facial expression. Her hair strand does not cover her left eye, the attorney's badge is missing from the lapel, and the jacket is cut slightly lower than in the final game. It is also worth mentioning that the lighting and shadows are drawn differently compared to the final sprite.
Unused Music
BGM009
Initially thought to be the original ending theme for the fourth episode, it was later confirmed by the game's composer, Masashi Sugimori, on his Twitter account that the track was intended to be the "We won the case!" theme (used at the end of each episode).
Kaiji Ganto ~ Sketch
This was seemingly intended as Damon Gant's main theme, but it was ultimately replaced by the more pompous "Kaiji Ganto ~ Swimming, Anyone?" tune.
This track is not present in the game's ROM data in any form — it first appeared on the "Gyakuten Saiban Yomigaeru Gyakuten — Yomigaeru Remix" album under the title "Kaiji Ganto ~ Sketch (Unused Tune)".
Credit Test (Trilogy HD)
The Trilogy HD re-release contains an unused track titled "credit_test". This is the earlier version of the track "mayoi_short_inst", which plays during the newly added Credits sequence (accessible via "Options"). The intro is almost identical to that of "mayoi_short_inst", but the main section features a chiptune-like instrument instead of an acoustic guitar.
Java2ME Port
A rather obscure fact is that the first game was also ported to J2ME-enabled cellphones — long before Android and iOS smartphones became a thing. There is limited information about this version, however. Supposedly, it was released around 2007 as a demo containing only the first episode, while subsequent chapters had to be downloaded via the Capcom World service. Since that service is no longer operational, only the demo remains in the wild for now.
Despite the platform's limitations, this version retains all the text, as well as some music, sprites, and backgrounds from the original. However, the sprites lack any form of animation — for the most part. It even features voice clips for the "Objection!", "Hold it!", and "Take That!" bubbles, though it lacks sound effects entirely; instead, they are somewhat emulated by a newly added vibration function.
User Interface
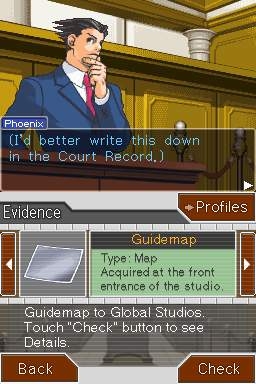
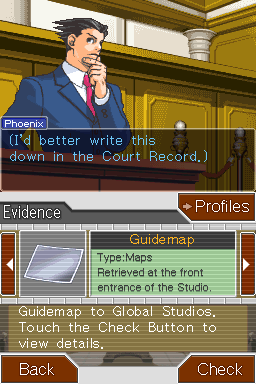
Original Japanese evidence subscreen design
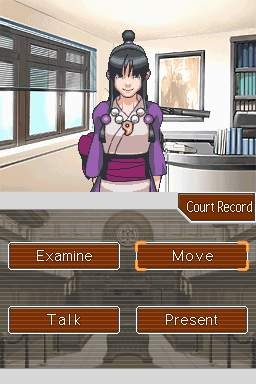
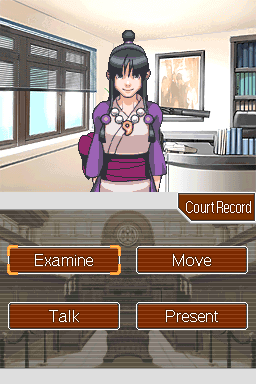
In the DS and 3DS editions of the first four titles, the evidence subscreen differs between the Western and Japanese releases. Such an implementation may seem unusual, as it requires extra code and graphics for all non-Japanese versions. However, as it turns out, this wasn't always the case.
The following image reveals that the Japanese evidence subscreen was originally identical to the English counterpart. It also demonstrates that the extra text found in the English version was actually translated from Japanese, rather than being made up, as one might assume.
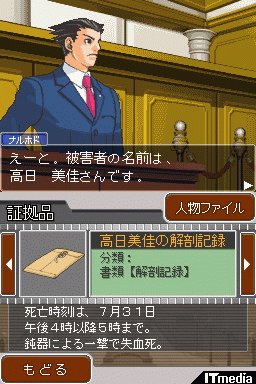
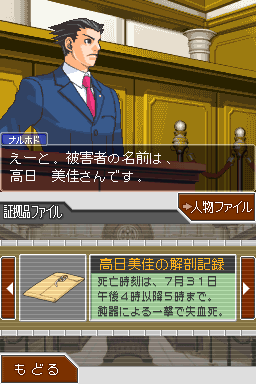
While it may seem like a huge loss, this extra bit of information does not, in fact, aid in game progression at all. Eventually, the Japanese evidence subscreen was reworked to resemble the design of the GBA version, while the English subscreen, for the most part, retained its original appearance.
Early UI Designs
At one point in its development the Nintendo DS port of the game featured a different UI design. Most notably, it had a radically different color scheme.


The UI in the following pre-release screenshots closely resembles that of the final game, though with some slight differences here and there.

Kudos to Jau_CR for discovering these screenshots.
Early Fingerprint Minigame UI
The E3 2005 trailer contains short footage of the fingerprint detection minigame, which at that point had a different UI design.
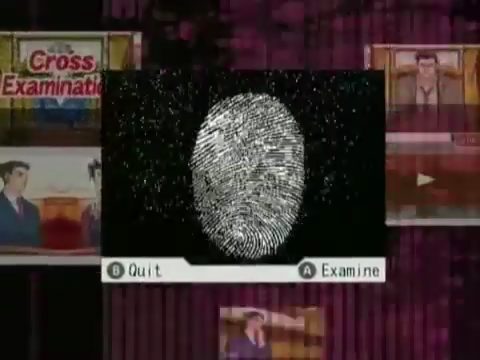
Curiously, the trailer also contains a clip that shows the main characters appearing on the bottom screen (see Lower Screen Character Images section for more information).
Kudos to Worst Aqua Player for making these discoveries.
Trivia
This section covers various minor details and trivia that do not fall under any specific category.
Although the Japanese version uses a black and white filter during most of the flashback scenes, it is not present in any of the regional ports of the game. However, it does appear in the "Rise from the Ashes" episode created specifically for the DS re-release.
When the game was ported to the Nintendo DS the developers made small changes to the Japanese dialogue in certain places and significantly improved the in-game presentation, with more diverse and dynamic animations and sound effects, making the first entry more in line with subsequent games. Despite this, the first four episodes of the English version (even in the most recent ports) are actually based on the older GBA scripts. Consequently, they lack most of the improvements made for the Japanese DS release, including the missing black-and-white filter mentioned above. Most likely, this occurred because the developers updated the original episodes only after they had finished working on "Rise from the Ashes" and had already dispatched the scripts to the translation agency handling the English localization.
In the second episode, when you encounter Gumshoe for the second time (upon receiving Maya's cellphone), you can present the glass shards to him:
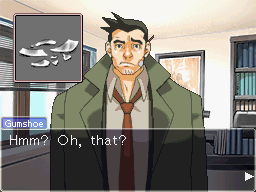
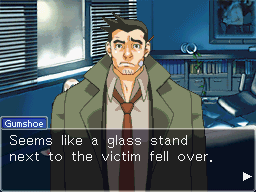
During this conversation, the background shifts to the office showing Mia’s body, yet Gumshoe remains on screen.
This is a clear oversight: since this is a flashback, Gumshoe should not be present. Moreover, his sprite actually obstructs the glass stand, rendering the visual context of the scene nonsensical.
In the DS version Will Power's sprite has one of its tiles misaligned on his right arm. This bug does not appear in other releases.
The US version is essentially identical to the Japanese release, except for the Japanese scripts, which have been replaced by dummy files (though the second and third games do retain them). This is to be expected, as the Japanese release already includes the English localization, which can be toggled directly from the main menu — just like in the Ace Attorney Trilogy for the 3DS.
The gunshot heard in the opening cutscene of the fourth episode is actually a reused sound effect of the Beretta M92 from Resident Evil (PS1).
At the end of the final investigation day in the fifth episode, after Gant confronts Phoenix, Ema, and Gumshoe in his office, the game automatically warps the player to the Detention Center and restricts movement to that area. Based on control codes found in the script, players were not originally forced to remain there; instead, they were free to explore all available locations. This restriction was likely implemented to prevent needless wandering before the trial.
Maya's profile can be found in the files of the first episode — a remnant from the time when the second episode was intended to be the first.
There is also a profile for Mia among the files of the fifth case; perhaps she was originally intended to play a more prominent role in that episode?